

Connect Okta Single Sign-On to Netos
Connect your company's Okta to Netos so your people sign in with their Okta account and Okta groups decide what they can do in NetBox. This guide is for the Okta administrator and the Netos contact working together on the setup.
What you need
Setup takes about 30 minutes in Okta, then Netos updates your zone. Have these ready before you start.
On your side (Okta administrator)
- An Okta administrator account that can create app integrations and edit Security > API > Authorization Servers > default.
- The email domains your people sign in with, for example
example.com. - Every user's Okta username is their work email in one of those domains.
- One Okta group per level of access, for example
netos-engineers(edit) andnetos-viewers(read only). - An MFA authenticator your users already hold (Okta Verify, Google Authenticator or similar).
From Netos (we send you)
- Your zone name, for example
uks001, and its two sign-in redirect URLs. - A public key (a JSON Web Key whose
kidstarts withnca-). There is no client secret.
Back to Netos (you send us, Step 5)
- Issuer URL, client ID, email domains, and which Okta group gets which access on which environment.
Purpose and audience
Every Netos environment sits behind a Netos zone gateway, for example https://<zone>.app.netos.io. The gateway signs users in with an identity provider, then passes their identity and groups to NetBox. When you connect Okta, the gateway sends every user whose email is in your company domain to your Okta, and reads their Okta groups to decide which NetBox groups they get on each environment.
You keep control of your people in Okta: who can sign in, their MFA, and their group membership. Netos keeps control of what each group may do in each environment.
When to use this guide
Use it when you want your users to sign in to Netos with Okta instead of a Netos ID account. Do not use it for Netos staff access or for API keys used by scripts; those are separate.
Prerequisites and limits
- An Okta organization where you can create applications and edit an authorization server. The guide uses the
defaultcustom authorization server. - Your zone name from Netos (for example
uks001). - The email domains your users sign in with (for example
example.com). Each domain is linked to one identity provider on a zone. Once a domain is linked to your Okta, users in that domain can only sign in to that zone through Okta. - Each user's Okta username must be their work email in one of those domains.
- No client secret is exchanged. Netos authenticates to Okta with a signed token (
private_key_jwt), so there is no shared secret to store or rotate on your side.
How sign-in works
sequenceDiagram
  actor U as User
  participant G as Netos zone gateway
  participant O as Your Okta
  participant N as NetBox
  U->>G: Open Netos link, enter work email
  G->>U: Continue with Okta
  U->>O: Sign in and MFA
  O->>G: ID token with groups
  G->>G: Map Okta groups to NetBox groups
  G->>N: Open NetBox as the user
- The user opens a Netos link and enters their work email.
- The gateway sees the email domain and shows Continue with Okta.
- Okta signs the user in and applies your sign-in policy, including MFA.
- Okta returns an ID token with the user's identity and groups.
- The gateway maps the Okta groups to the access you agreed with Netos and opens NetBox. NetBox creates the user on first sign-in.
What your users see
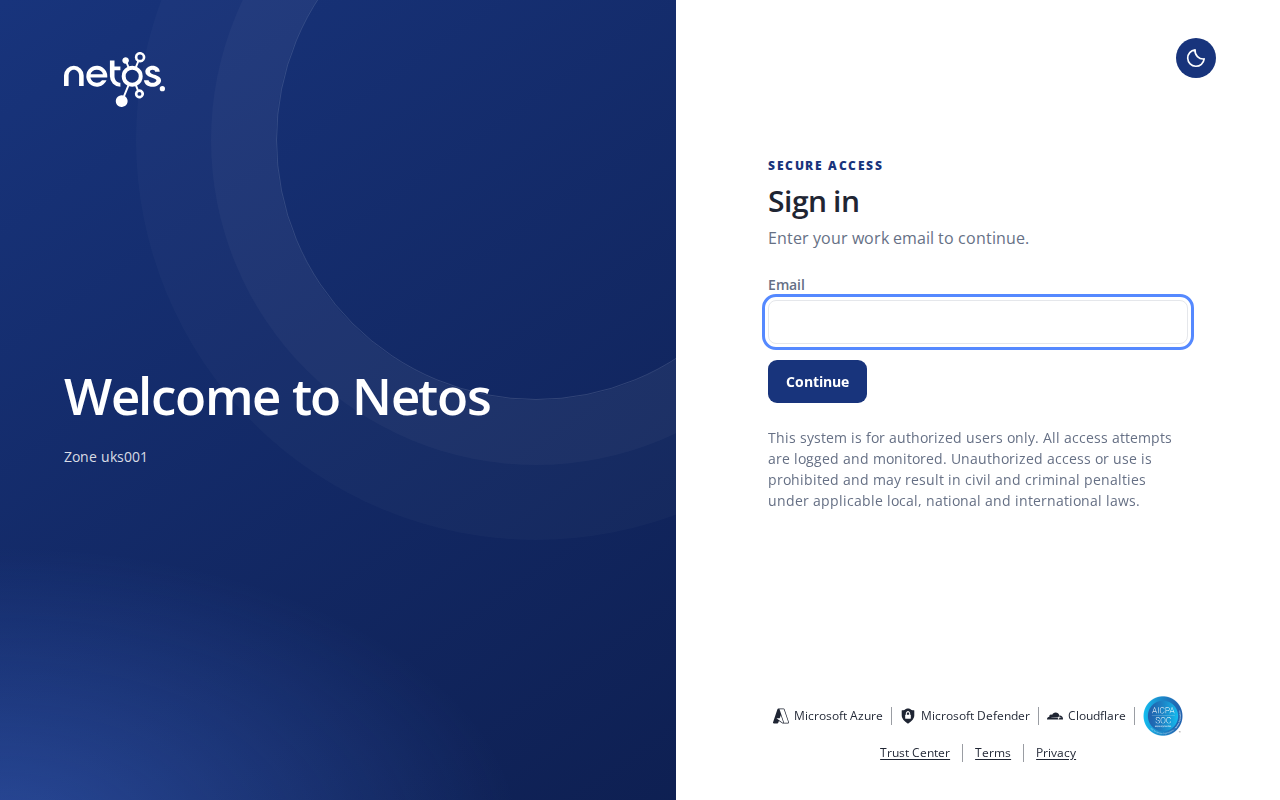
They enter their work email on the Netos sign-in page.
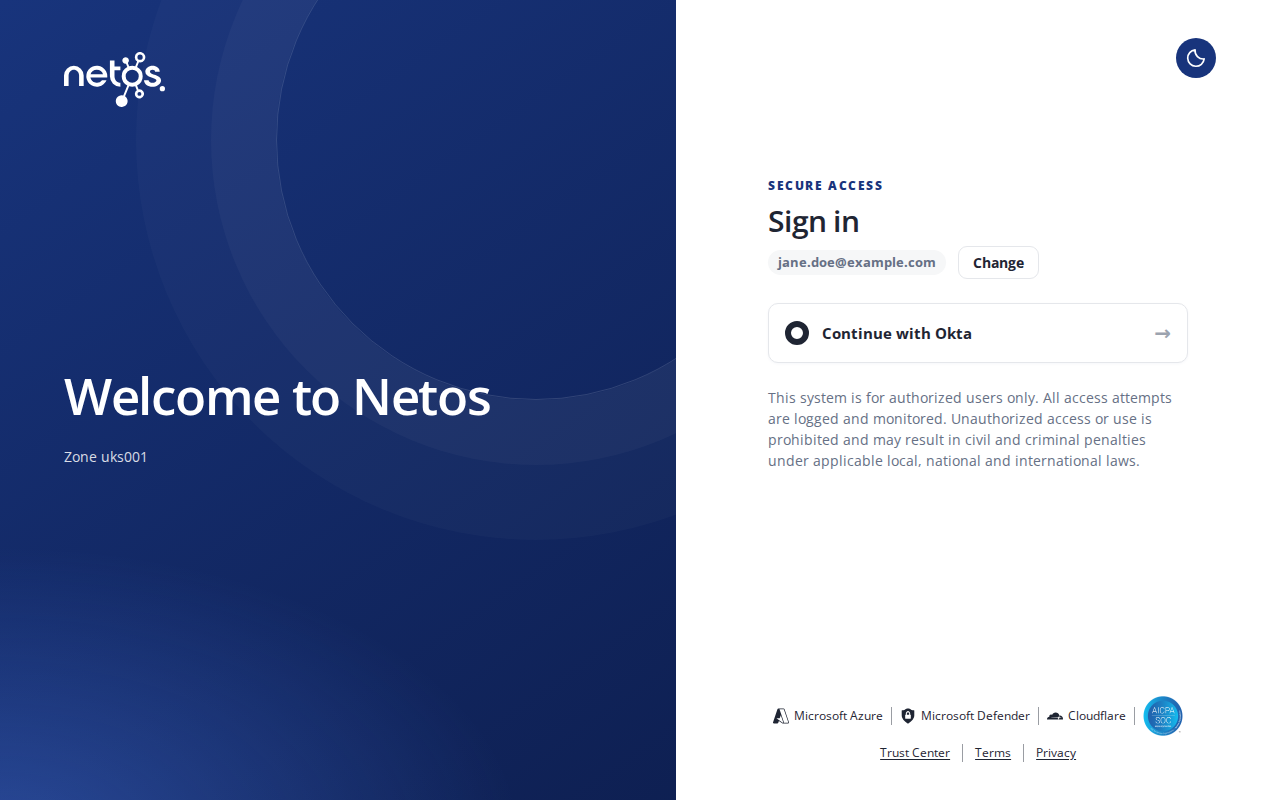
Netos recognises the domain and offers Continue with Okta.
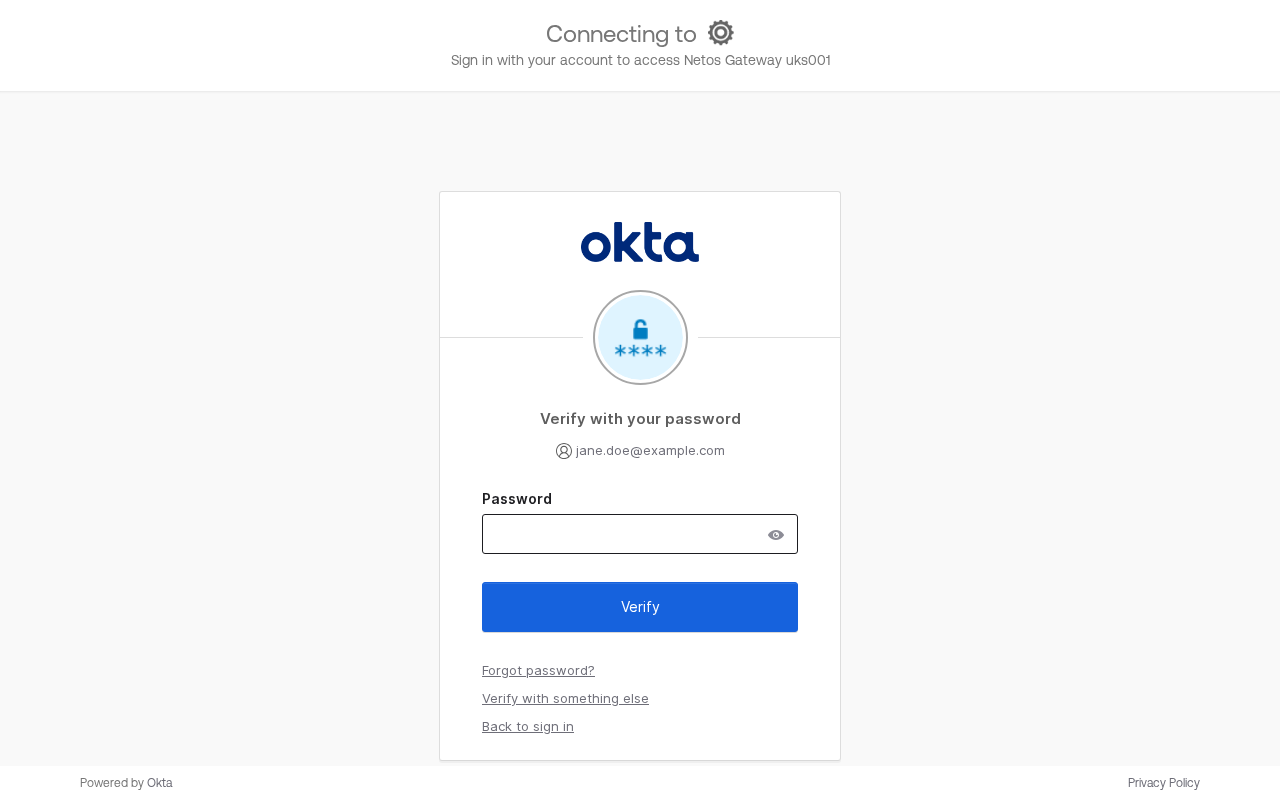
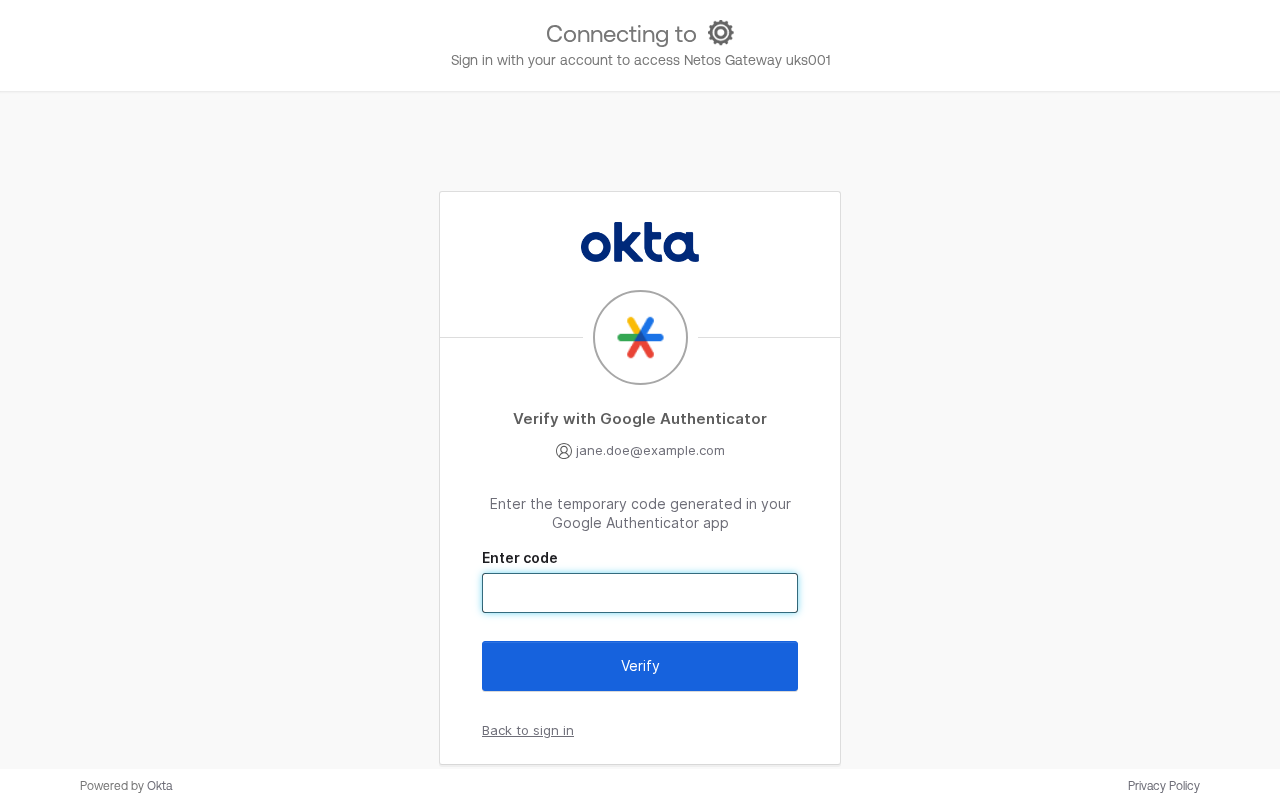
Okta asks for their password, then their MFA code.
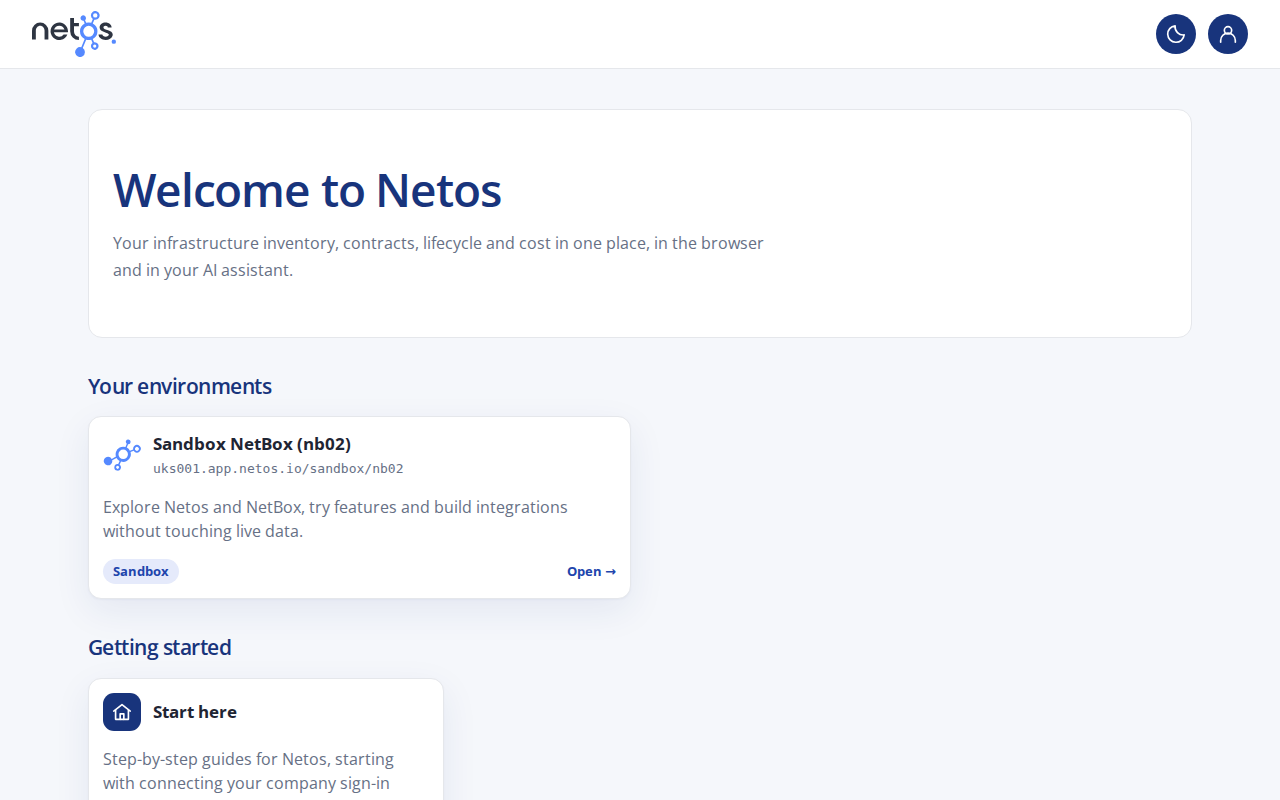
They land on your Netos home page with the environments they can use.
Group changes in Okta apply the next time the user signs in. Sessions are checked against Okta again at a fixed interval set for your zone.
Step 1: Create the Okta application
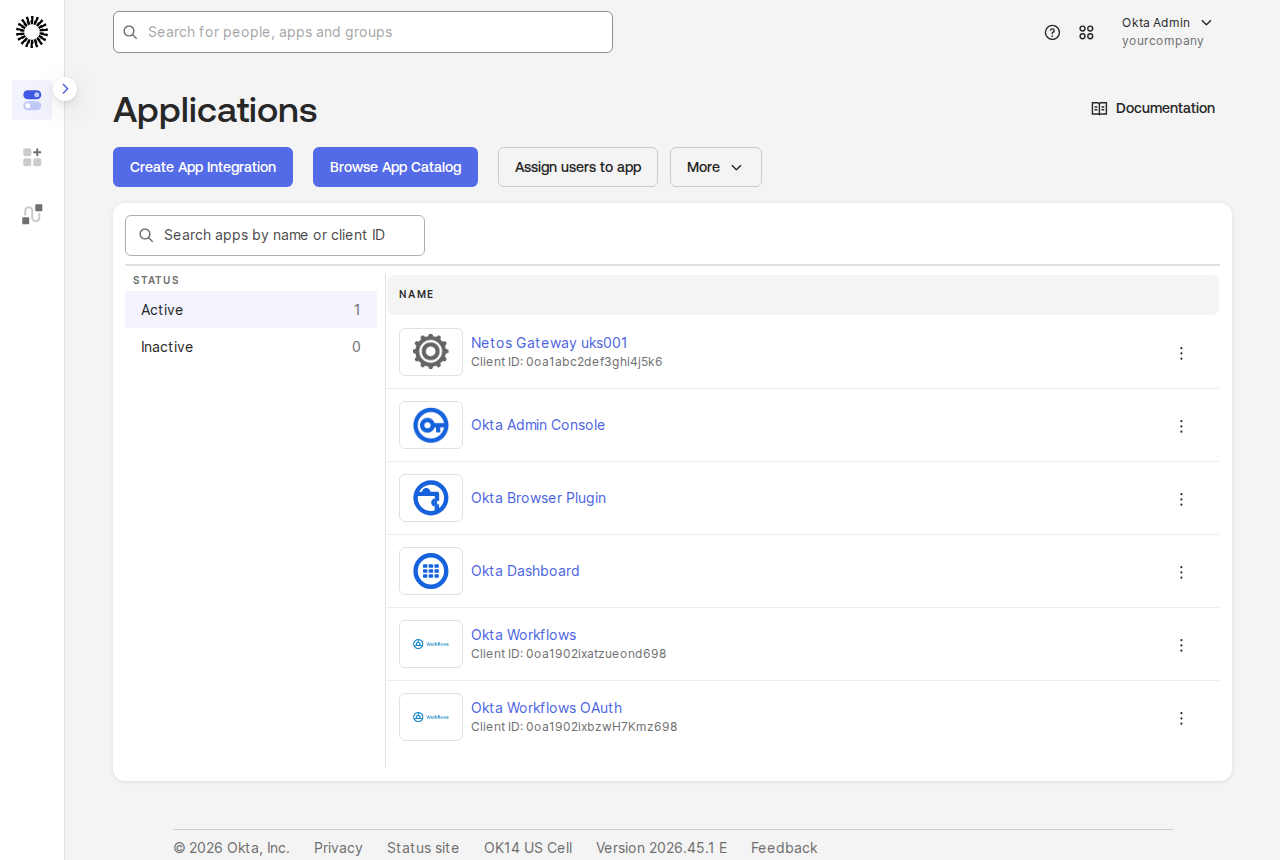
In the Okta Admin Console, open Applications > Applications and select Create App Integration.
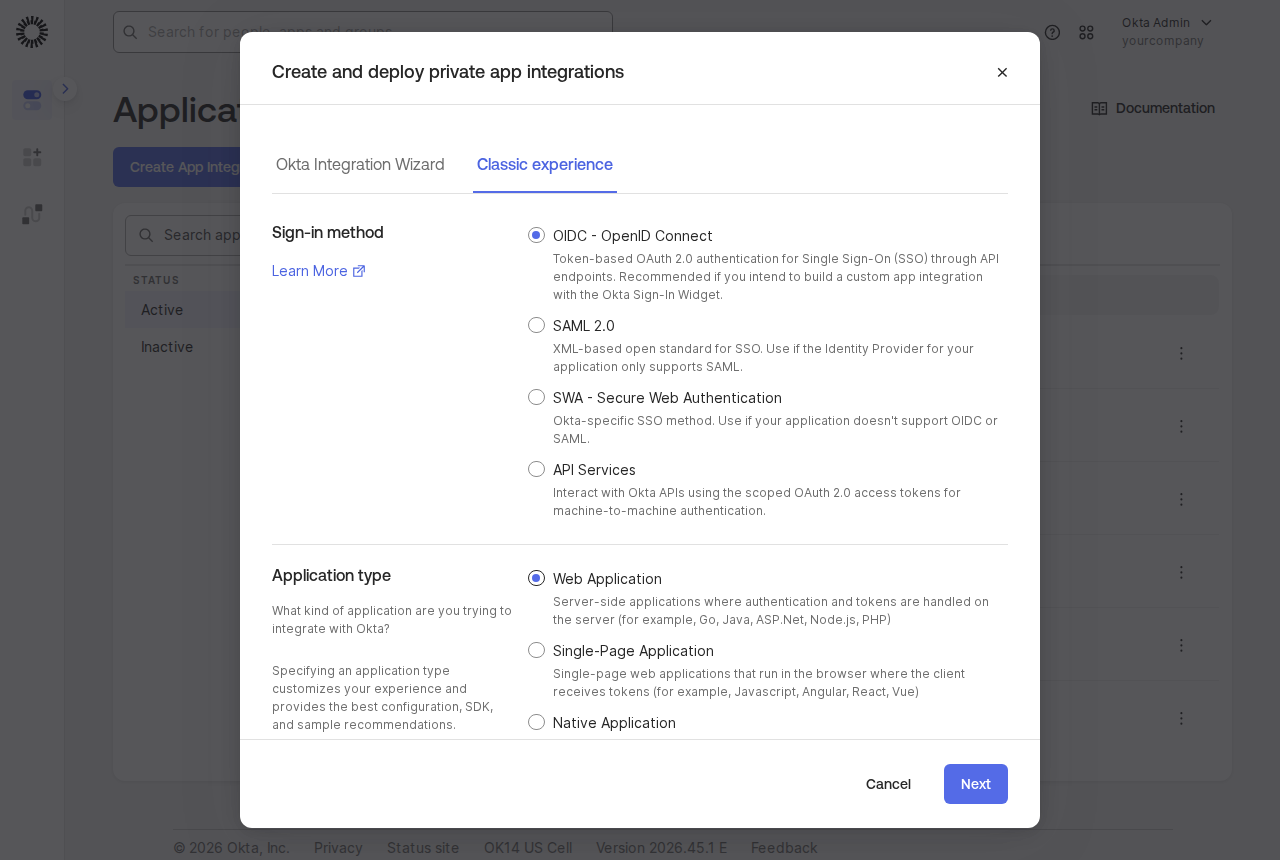
Select the Classic experience tab, then choose OIDC - OpenID Connect and Web Application, and select Next.
Name it, for example
Netos <zone>.Grant types: Authorization Code and Refresh Token.
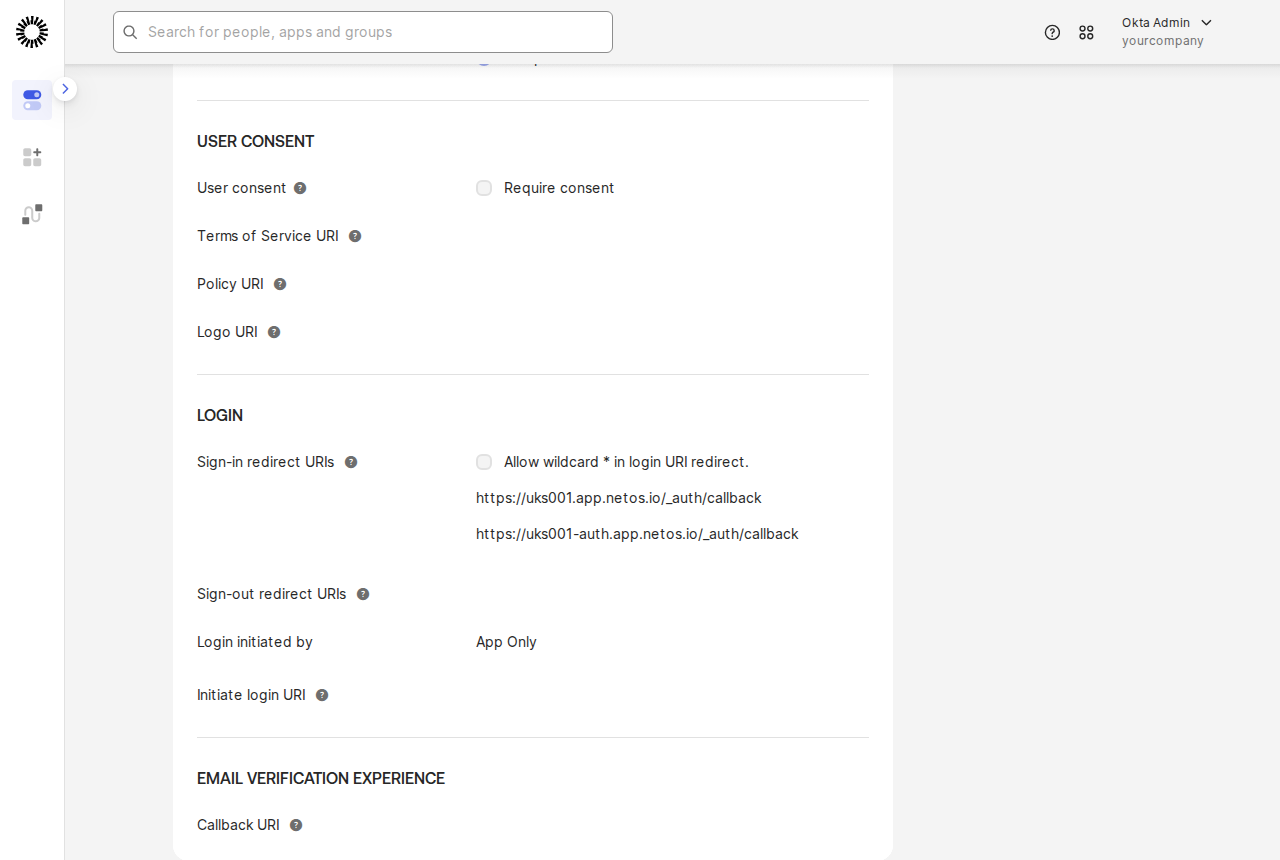
Sign-in redirect URIs, both of these:
https://<zone>.app.netos.io/_auth/callbackhttps://<zone>-auth.app.netos.io/_auth/callback
Save, then open General > Client Credentials and set Client authentication to Public key / Private key.
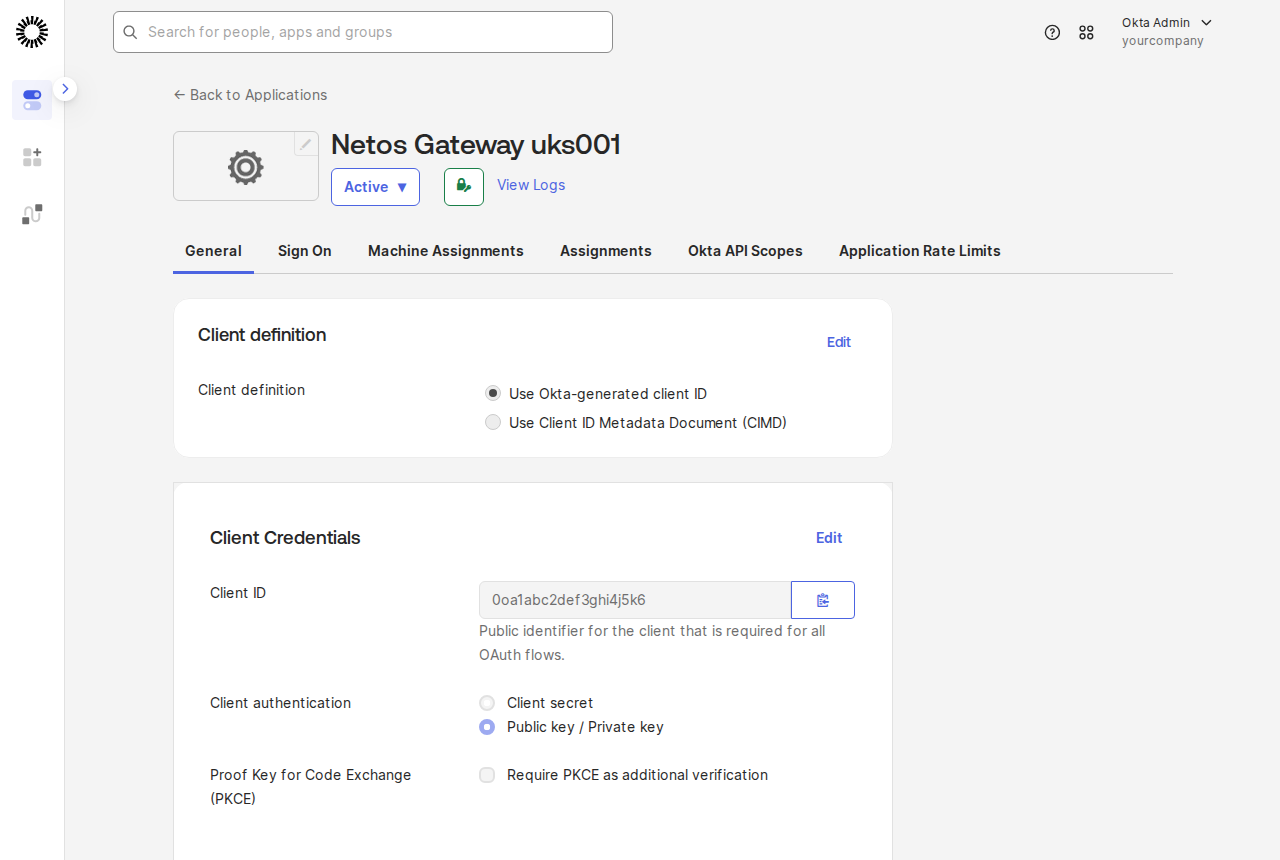
Add the public key Netos sends you for your zone (a JSON Web Key with a
kidthat starts withnca-). Do not generate a key in Okta.Under Assignments, assign the Okta groups whose members may sign in to Netos.
Step 2: Add the groups claim
Netos reads group names from a groups claim in the ID token.
- Open Security > API > Authorization Servers > default > Claims > Add Claim.
- Name
groups, include in ID Token, Always. - Value type Groups, filter Matches regex
.*, or a narrower filter that keeps the groups you will use for Netos. - Include in Any scope.
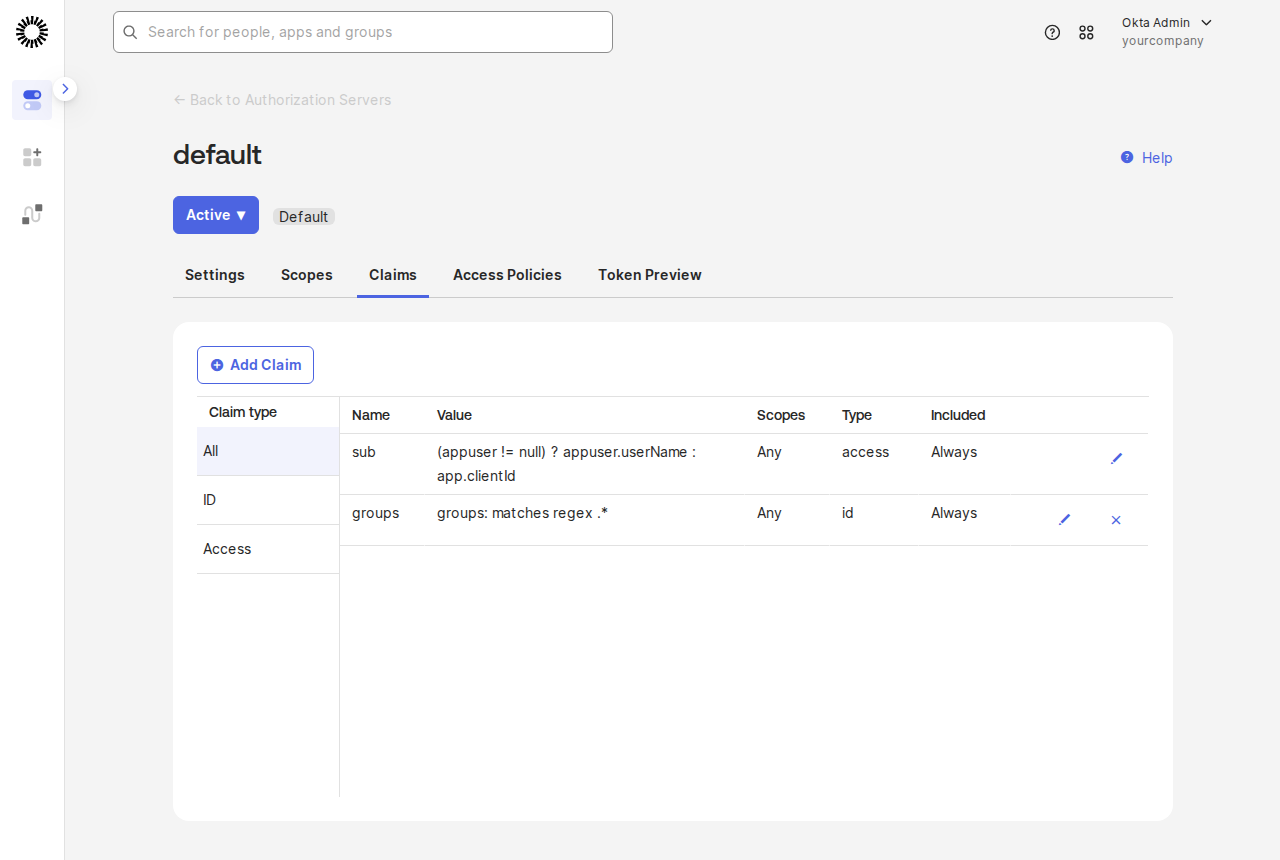
Okta sends group names, not IDs. Avoid renaming a group you use for Netos without telling Netos first.
Step 3: Allow the application on the authorization server
- Open Security > API > Authorization Servers > default > Access Policies.
- Add a policy assigned to the Netos application, with a rule that allows the Authorization Code grant for the users or groups who use Netos.
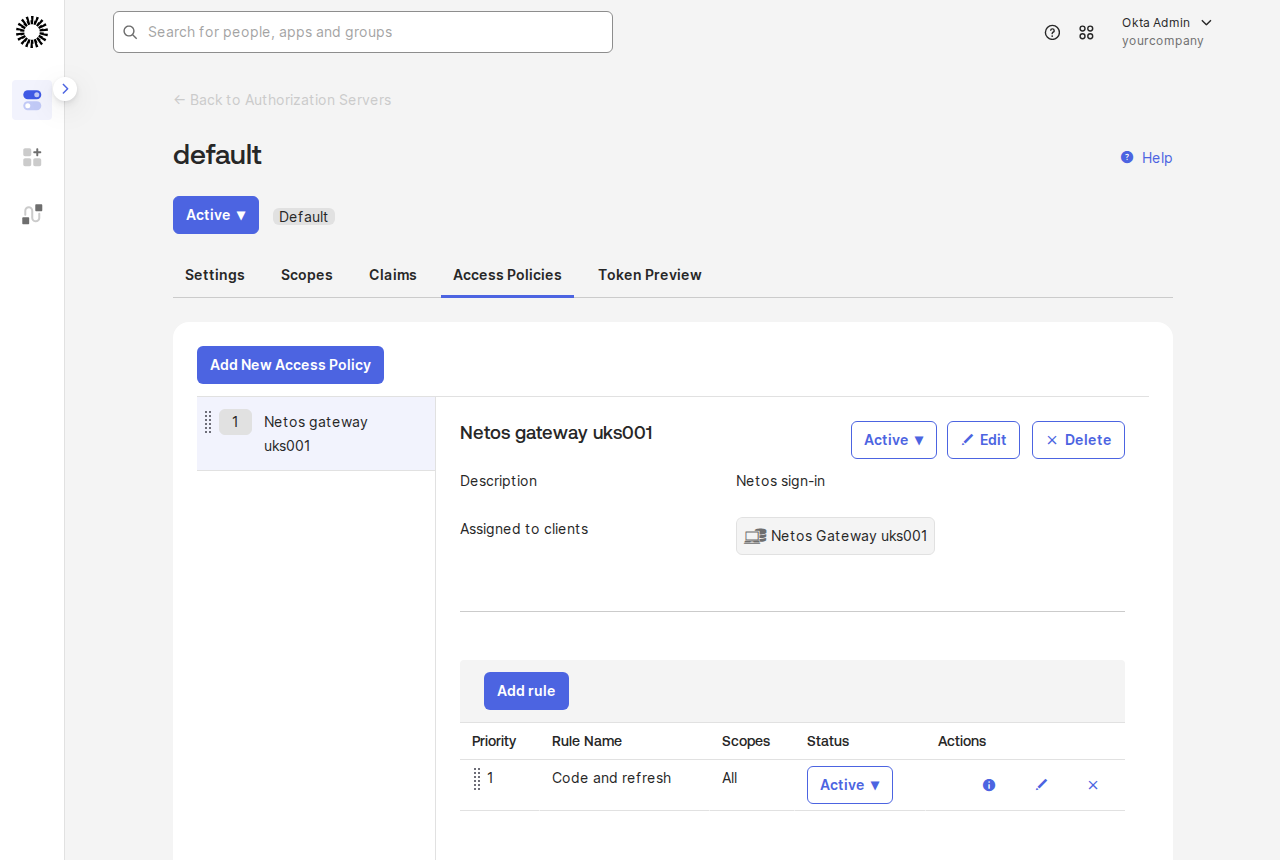
Without this, Okta refuses to issue tokens to the Netos application.
Step 4: Set the sign-in policy
Netos treats a sign-in as MFA when Okta reports it (amr contains mfa). Production environments require MFA.
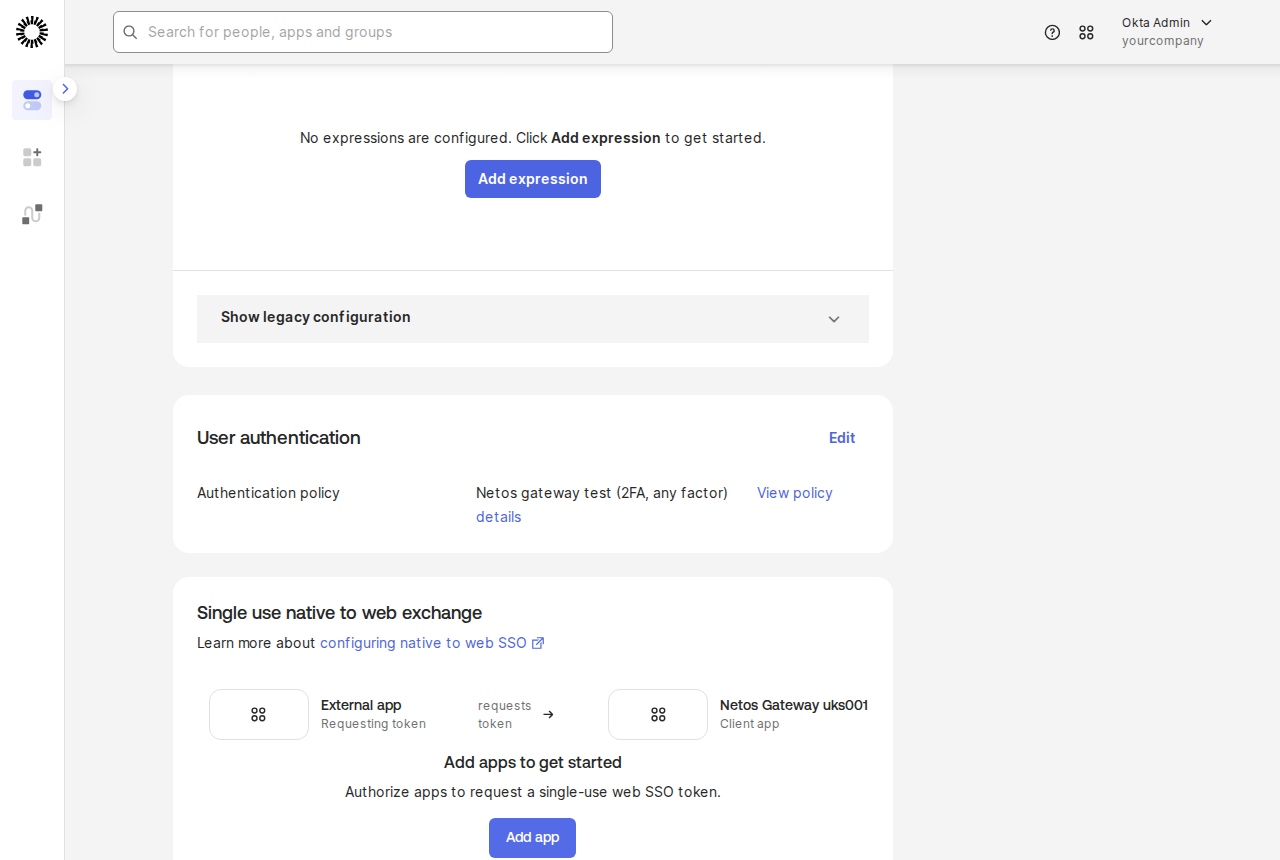
- Open the application's Sign On tab and choose an authentication policy that requires two factors.
- Make sure the policy accepts the factors your users actually hold. Okta's default "Any two factors" policy can require phishing-resistant Okta Verify; users with only another authenticator then cannot finish sign-in.
Step 5: Send these details to Netos
| Item | Example |
|---|---|
| Issuer URL | https://<your-okta-domain>/oauth2/default |
| Client ID | 0oa1abc2def3ghi4j5k6 |
| Email domains | example.com |
| Okta groups and the access each should get | netbox-readers: read on all environments; netbox-engineers: edit on lab, read on production |
Netos adds Okta to your zone, links the groups to NetBox groups per environment, releases the zone change, and confirms when you can test.
Groups and permissions
Access is granted per environment, not per user. Each Okta group you name is linked to NetBox groups on specific environments, so the same person can have edit rights on a lab environment and read-only rights on production. Users in no linked group are refused at the gateway with "Access denied".
To change what someone can do, change their Okta group membership. The change applies at their next sign-in. To change what a group can do, ask Netos.
Worked example
Example Corp signs in with example.com and has two Netos environments in its zone: a lab and production.
- In Okta, the administrator creates the
Netos <zone>application (Step 1), adds thegroupsclaim (Step 2), the access policy (Step 3) and a two-factor sign-in policy (Step 4). - They create two Okta groups,
netos-engineersandnetos-viewers, and assign both to the application. - They send Netos the issuer URL, the client ID, the domain
example.com, and the access wanted:netos-engineersedit on the lab and read on production;netos-viewersread on both. - Netos confirms the zone is updated. An engineer signs in at the lab link, sees Continue with Okta, completes MFA and can edit records on the lab. On production the same person can view but not edit.
- When the engineer moves teams, the administrator moves them to
netos-viewers. At their next sign-in they keep read access and lose edit rights on the lab.
Test checklist
- A user in a linked group opens your Netos link, enters their email, and sees Continue with Okta.
- They complete Okta sign-in and MFA, then land in NetBox with their name shown.
- In NetBox, their user is in the expected group for that environment.
- Move them to a different Okta group and sign in again; their NetBox group changes.
- A user in no linked group gets "Access denied".
Removing access
Remove the user from the Netos groups in Okta, or deactivate them. They cannot start a new session, and existing browser sessions end at the next check against Okta. Netos API keys are not checked against Okta, so ask Netos support to revoke any API keys issued for the user.
Troubleshooting
| What the user sees | Likely cause | Fix |
|---|---|---|
| Email goes to Netos ID instead of Okta | The email domain is not linked to Okta on this zone | Send Netos the domain |
| Okta asks to set up Okta Verify and the user cannot continue | The sign-in policy requires an authenticator the user does not have | Adjust the application's authentication policy (Step 4) |
| "Sign in failed" after Okta | Netos could not complete the token exchange, often a missing or wrong public key, or no access policy on the authorization server | Check Steps 1.6 and 3, then send Netos the time of the attempt |
| "Access denied" after Okta | The user is in no linked group, or their Okta username is not an email in a linked domain | Check group assignment and the user's Okta username |
Netos support can trace a failed sign-in from the reference ID shown on the error page.